article Building a simple Blender 2.80 Addon (Draft) ~17 minute read
Blender’s addon API may be documented, but the documentation is not all in one place, and lots of the intricacies (such as UI layout) aren’t documented very well. Here, I’ll show you how all the different Blender APIs go together to create an addon.
This tutorial was created with Blender 2.80-rc2 and will not work with older versions of Blender.
Some useful tips
There are some things you can do to make Blender addon development easier.
You may want to run Blender from a terminal. This way, you can see the output of any
print()functions on the terminal.Enable “Tooltips” and “Python Tooltips” in the Interface tab of Blender’s User Preferences (Edit > Preferences). This makes it easy to see the names of operators and properties by hovering over buttons or menu items.
Enable “Developer Extras” in the Interface tab of the User Preferences. This lets you right-click on buttons and menu items to copy the relevant Python function.
You’ll find yourself needing to reload your addons very often. This can be done either by restarting Blender, or by opening the Search (by pressing
F3) and searching for “Reload Scripts”. If you’d like, you can add a keybinding for this:- Open the User Preferences (Edit > Preferences)
- Select the “Keymap” tab
- Open the “Screen” section, then the “Screen (Global)” section.
- Click on the “Add New” button at the bottom of the “Screen (Global)” section.
- Open the new keybinding (currently labeled
none). - In the text field on the left, enter
script.reload - Set the keybinding to whatever you want to! I recommend
F8, because it’s not used by Blender.
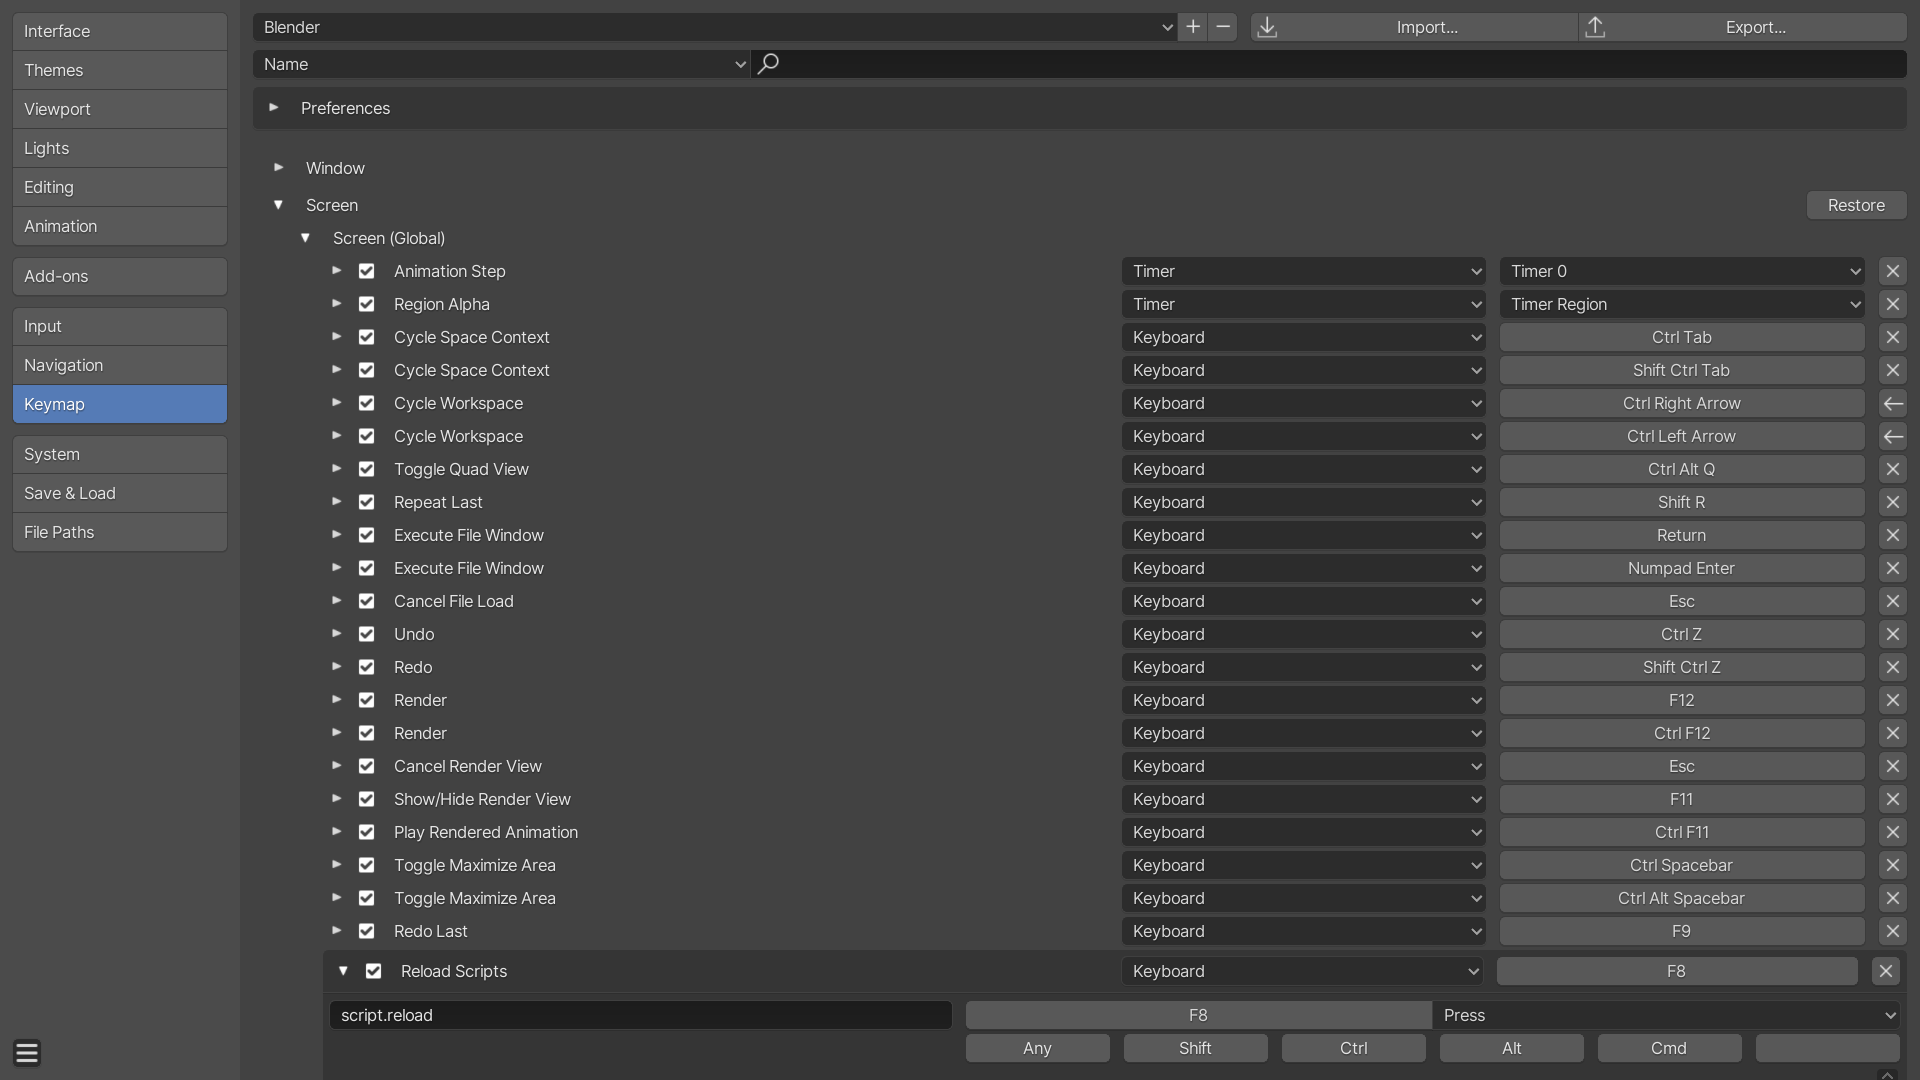
The keybinding should look something like this.
Addon Location
A Blender addon is just a Python module or package, located in Blender’s addon folder. The location of Blender’s addon folder depends on your OS.
C:\Users\<username>\AppData\Roaming\Blender Foundation\Blender\<blender-version>\scripts\addons\
/Users/<user>/Library/Application Support/Blender/<blender-version>/scripts/addons/
/home/<user>/.config/blender/<blender-version>/scripts/addons/
For example, if your addon is a Python file named object_duplicate_translate.py, it
would be located in [...]/scripts/addons/object_duplicate_translate.py.
A quick note on packages vs modules
A Python package is a directory containing at least __init__.py. A
Python module is just a single file. For our addon,
object_duplicate_translate, we don’t need multiple files so we’re
using a single module named object_duplicate_translate.py. However,
if you are building a complex addon that uses multiple files, you
would need to create a package, not a module. In that case, you’d put
bl_info in the package’s __init__.py file; in our case, that would
be object_duplicate_translate/__init__.py.
Metadata
Before you can do much of anything, you need to tell Blender about
your addon. To do this, create a global variable named bl_info in
the main Python file of your addon. Blender will look for this
dictionary to figure out what your addon does.
bl_info = {

    # The name of your addon. This is shown in the addon tab in
    # Blender's user preferences.
    'name': 'Duplicate and Translate',

    # A short, one-line description; this is also displayed in the
    # user preferences.
    'description': 'Duplicates and translates selected object(s)',

    # The author of this addon.
    'author': 'Jon Ross',

    # A tuple, containing the addon version.
    'version': (0, 1, 0),

    # The earliest Blender version this addon will work with. If
    # you're not sure what versions of Blender your addon is
    # compatible with, use the version of Blender you're developing
    # the addon with. (To find out the exact version you're using,
    # go to Blender's Console and type 'bpy.app.version', then press
    # `Enter`.)
    #
    # Note that the addon API changed substantially with Blender 2.80,
    # so decide early if you want to make your extension for 2.79 and
    # earlier, or 2.80 and later.
    'blender': (2, 80, 0),

    # This is where users should look for your addon.
    'location': 'View3D > Object > Transform > Duplicate and Transform',

    # This is shown to users in the addon tab of Blender's user preferences.
    'warning': 'This is my first Blender addon. Make of that what you will.',

    # This can be either 'OFFICIAL', 'COMMUNITY', or
    # 'TESTING'. 'OFFICIAL' should only be used if your addon is
    # included with Blender. (If you're not sure, don't use
    # 'OFFICIAL'.) 'COMMUNITY' and 'TESTING' are both fine to
    # use. Note that 'TESTING' addons aren't shown by default in
    # Blender's addon list.
    'support': 'COMMUNITY',

    # Addon category; shown on the left side of Blender's addon list
    # to make filtering simpler. This must be one of the categories as
    # listed in Blender's addon tab; if it's not, it will create a new
    # category for your addon (which may be good or bad.) Don't create
    # new categories to make your addon stand out.
    'category': '3D View',

    # Optional; specifies the wiki URL for an addon. This will appear
    # in your addon listing as "Documentation".
    'wiki_url': '<documentation URL>',

    # Optional; specifies the bugtracker URL for an addon. This will
    # appear in your addon listing as "Report a Bug".
    'tracker_url': '<bugtracker URL>'
}

# ...
Obviously, you don’t need to keep the comments I’ve included. Here’s the same metadata block, just without comments, provided for your copy-paste convenience:
bl_info = {
    'name': 'Duplicate and Translate',
    'description': 'Duplicates and translates selected object(s)',
    'author': 'Jon Ross',
    'version': (0, 1, 0),

    'blender': (2, 80, 0),

    'location': 'View3D > Object > Transform > Duplicate and Transform',
    'warning': 'This is my first Blender addon. Make of that what you will.',
    'support': 'COMMUNITY',
    'category': '3D View',

    'wiki_url': '<documentation URL>',
    'tracker_url': '<bugtracker URL>'
}

# ...
Registering and unregistering your addon
Addons can be enabled and disabled by the user at any time. This means
that every addon must be able to handle being registered (enabled) and
unregistered (disabled) at runtime, without needing to restart
Blender. To accomplish this, there are two global functions addons
need to define, appropriately named register and
unregister. They’re called when the user enables or disables your
addon, respectively; in addition, register is also called when
Blender is starting up and your addon is enabled.
Within the register(...) and unregister(...) functions, you must
tell Blender exactly what operators your addon contains. This is done
with the functions bpy.utils.register_class(...) and
bpy.utils.unregister_class(...), used to register and unregister a
Blender class, respectively. Here, we’ll use them to register and
unregister our Operator.
# ...

def register():
    bpy.utils.register_class(DuplicateAndTranslate)


def unregister():
    bpy.utils.unregister_class(DuplicateAndTranslate)

# ...
More than just operators
This tutorial only contains an Operator, so we only have a single
class (extending bpy.types.Operator) that we need to register and
unregister. However, Blender has many more extensible classes beyond
just Operator; if you use them, these also need to be registered and
unregistered.
To keep this tutorial (relatively) simple, we won’t be covering
anything beyond bpy.types.Operator in this tutorial. Just keep in
mind that register_class and unregister_class can be called with
classes other than Operator.
Enabling the addon within Blender
Open Blender’s User Preferences (either via Edit > Preferences or
with the Operator Search tool (with F3; search for Show
Preferences.) Click on the Add-Ons tab, then type the name of your
addon into the search box. (You may need to ask Blender to check for
new addons with the Refresh button.)
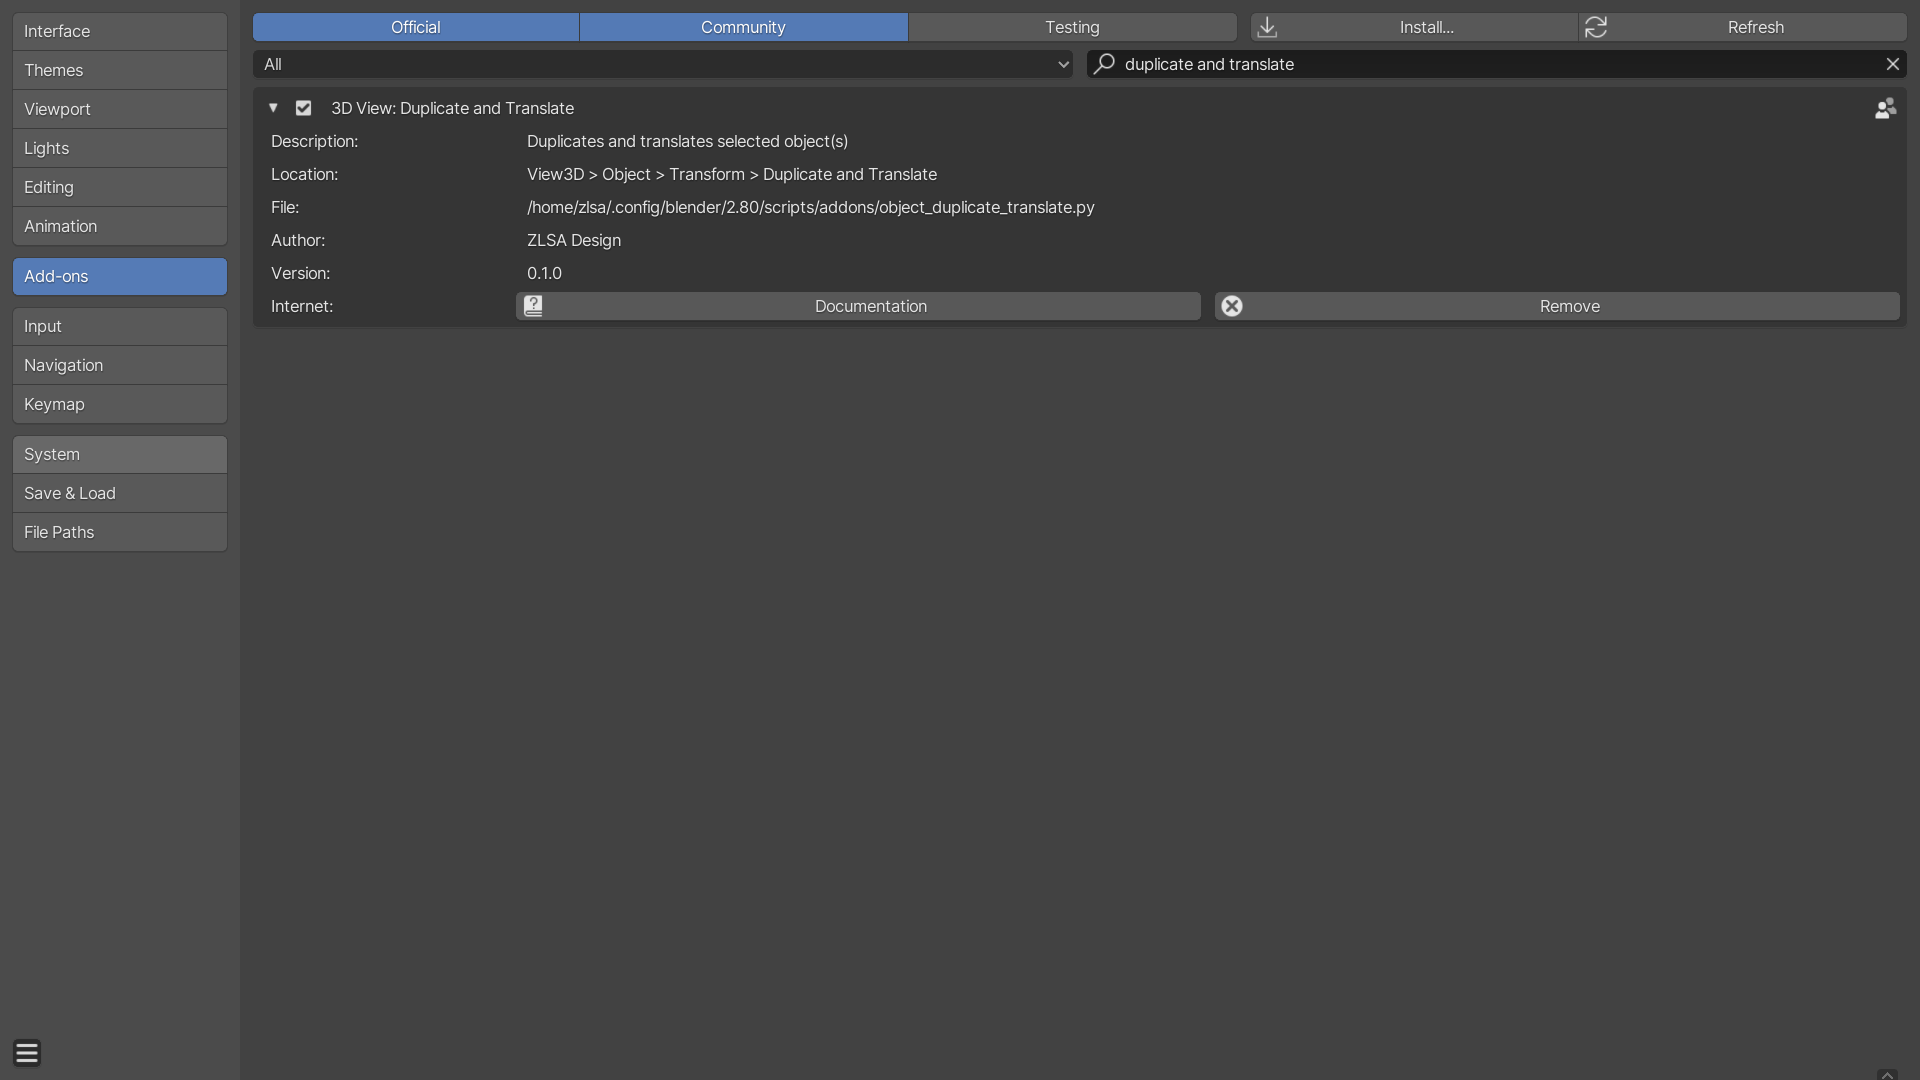
How to enable our new addon.
If your addon shows up, then click the checkbox on the left side to enable it; if it doesn’t show up, it means Blender can’t find your addon.
If Blender displays an angry Python backtrace when you enable your
addon now, that’s fine! It’s just because we haven’t created the
DuplicateAndTranslate operator just yet, so Blender can’t register
it yet.
Creating an Operator
“Operator” is Blender’s name for a single operation. For example,
operators can be used to add a cube with
bpy.ops.mesh.primitive_cube_add(...), translating an object with
bpy.ops.transform.translate(...), and even rendering the scene with
bpy.ops.render.render(...). In short, every button that performs an
action extends the base bpy.types.Operator class.
Searching operators in Blender
To see a complete list of operators in Blender, you can use the
Operator Search tool. Open it by pressing the F3 key, then type in a
name to narrow down the results.
An Operator is simply a class that extends bpy.types.Operator
(note that you’ll need to import bpy or that won’t work.) A basic
Operator class must set some static variables:
bl_idnamemust be set to a valid Python identifier. This is used internally by Blender to call your operator.bl_labelis used to show the user what this operator does.
For inspiration, hover over buttons in Blender to see what
the built-in operators are called. You can also set bl_description
to provide a description of the operator. More information is
available at
Blender’s official documentation.
# ...

class DuplicateAndTranslate(bpy.types.Operator):
    bl_idname = 'transform.duplicate_and_translate'
    bl_label = 'Duplicate and Translate'
    bl_description = 'Duplicate and translate selected object(s)'

   def execute(self, context):
       return {'FINISHED'}
# ...
The execute(...) method is called whenever Blender runs the
operator as a Python function; it’s given the current context
(containing context.object for the active object, context.scene
for the active scene, etc. Learn more about contexts at
Blender’s official documentation.)
Note that the operator itself doesn’t do anything yet; it just returns a
Python set
containing the string value FINISHED.
(Here’s a list
of other values you can return from execute(...).)
So far, we’ve only defined an The On the other hand, If the operator does not contain the A quick note on
execute(...) vs invoke(...)execute method, not an invoke
method. The two methods are called at different times, and under
different circumstances.execute method is called whenever the operator is called from
Python (for example, by calling bpy.ops.object.duplicate(...)).invoke is called when the user interactively runs
an operator and expects to provide more information (such as using the
mouse and/or keyboard to modify parameters, like the Move or Rotate
operators built into Blender.)invoke method, the default
implementation will automatically call the execute method instead,
and the developer of the addon won’t need to worry about invoke.
Since other operators can be called from Python, it’s quite simple to duplicate the active object by just using Blender’s built-in “Duplicate” operator. But first, we need to find out what it’s called.
Using Blender
First, you’ll need to make sure “Python Tooltips” is enabled in the Interface tab of Blender’s user preferences. With this option enabled, tooltips will show you the operator or property path when you hover over operator buttons or input fields.
Now, find a place within the UI that lets you run the “Duplicate” operator;
a good place is in the Object menu in the 3D View. From this, you can
see that “Duplicate Objects” is called object.duplicate_move (the
bpy.ops in front part just specifies that this is an operator.)
Using the documentation
Visit the operators page of the documentation; the operators themselves are split into many different categories. We’re looking for the “Duplicate” operator, which should be in the “Object Operators” section.
A quick search for “duplicate” leads us to
object.duplicate,
which does exactly what we want to do!
If you looked through Blender’s menus to find the operator, you’ve
seen that the Object > Duplicate Objects menu item is actually running
the For the purposes of this addon, Convenience operators
object.duplicate_move operator; what’s with the _move part?
It’s actually just a shortcut to the object.duplicate operator,
invoked with the mode set to TRANSLATION. This is something that’s
trivial to do from Python, but might get a little cumbersome if the
parameter needed to be set every time the Duplicate operator was
inserted into a menu or button.object.duplicate and
object.duplicate_move are identical, since we’re using the Python
API to run these operators. That means we’re using the execute
method on the operator, not invoke.
So now that we’ve determined that the “Duplicate Objects” operator is
called object.duplicate, we just need to call it.
# ...

class DuplicateAndTranslate(bpy.types.Operator):
    bl_idname = 'transform.duplicate_and_translate'
    bl_label = 'Duplicate and Translate'
    bl_description = 'Duplicate and translate selected object(s)'

    def execute(self, context):

        # Call Blender's "Duplicate Objects" operator.
        bpy.ops.object.duplicate()

        return {'FINISHED'}
# ...
And that’s it! If you reload your addon, press Space to bring up the
searchbox, and search for “Duplicate and Translate,” you’ll see your
new operator in the list. When you press Enter to run the operator,
the execute(...) method is called and the object is duplicated! It’s
hard to tell, though, since the duplicated object is in the exact same
location as the original. You can make sure it’s a duplicate by
looking at the name or moving it (and confirming that the original is
still there.)
Potential issues
Note that we’re using the object.duplicate(...) operator here. This
operator only works in object mode, so for now, make sure you’re in
object mode when running the operator. If you’re in the wrong mode,
the object.duplicate(...) operator will throw an exception, and
Blender will display the backtrace to you in a menu and in the
terminal output (if present.) We’ll fix this soon (see: Creating a
poll method, later in this tutorial.)
In addition, if there’s nothing selected in the scene, the operator won’t do anything at all because there’s nothing to duplicate. Make sure you have something to duplicate!
By default, Blender duplicates the object and immediately switches to
the translate operator; how do we cancel that from within code? It
turns out that we don’t have to, since that behavior is only used when
the operator is invoked with the Since we’ll call the direct Python function, Blender will use the
Another note on the
invoke methodinvoke method.execute method of the operator. This is a complicated discussion for
another time, but suffice it to say that operations will not perform
modal actions (such as mouse-guided extrude, translate, rotate, etc.)
when called from Python.
From here, it’s easy to find out what the translate operator is
called: transform.translate. All we have to do is add it to our
execute function after object.duplicate.
But wait! The following line won’t work. Or rather, it’ll work perfectly, but it won’t actually move the object, either by itself or by requesting the user move the mouse.
# ...

class DuplicateAndTranslate(bpy.types.Operator):

    # ...

    def execute(self, context):
        # ...

        # And then transform the objects with the "Translate" operator.
        bpy.ops.transform.translate()

        # ...
# ...
This again demonstrates the difference between the execute(...) and
the invoke(...) methods. The transform.translate(...) operator
does indeed move the newly-duplicated objects… by zero units in
every direction. We need to somehow override this.
So let’s take a look at the documentation for the
transform.translate(...)
operator. Note the first parameter, value: that’s an array of three
values, defining the distance to translate in each of the X, Y, and Z
axes.
After adding a distance to move, your code should look something like this:
# ...

class DuplicateAndTranslate(bpy.types.Operator):

    # ...

    def execute(self, context):
        # ...

        # Transform the objects in the positive Z axis (up) by three meters.
        bpy.ops.transform.translate(value=[0, 0, 3])

        # ...
# ...
Now, if you run the Duplicate and Translate operator again, you should see a new object, three meters above the previous one.
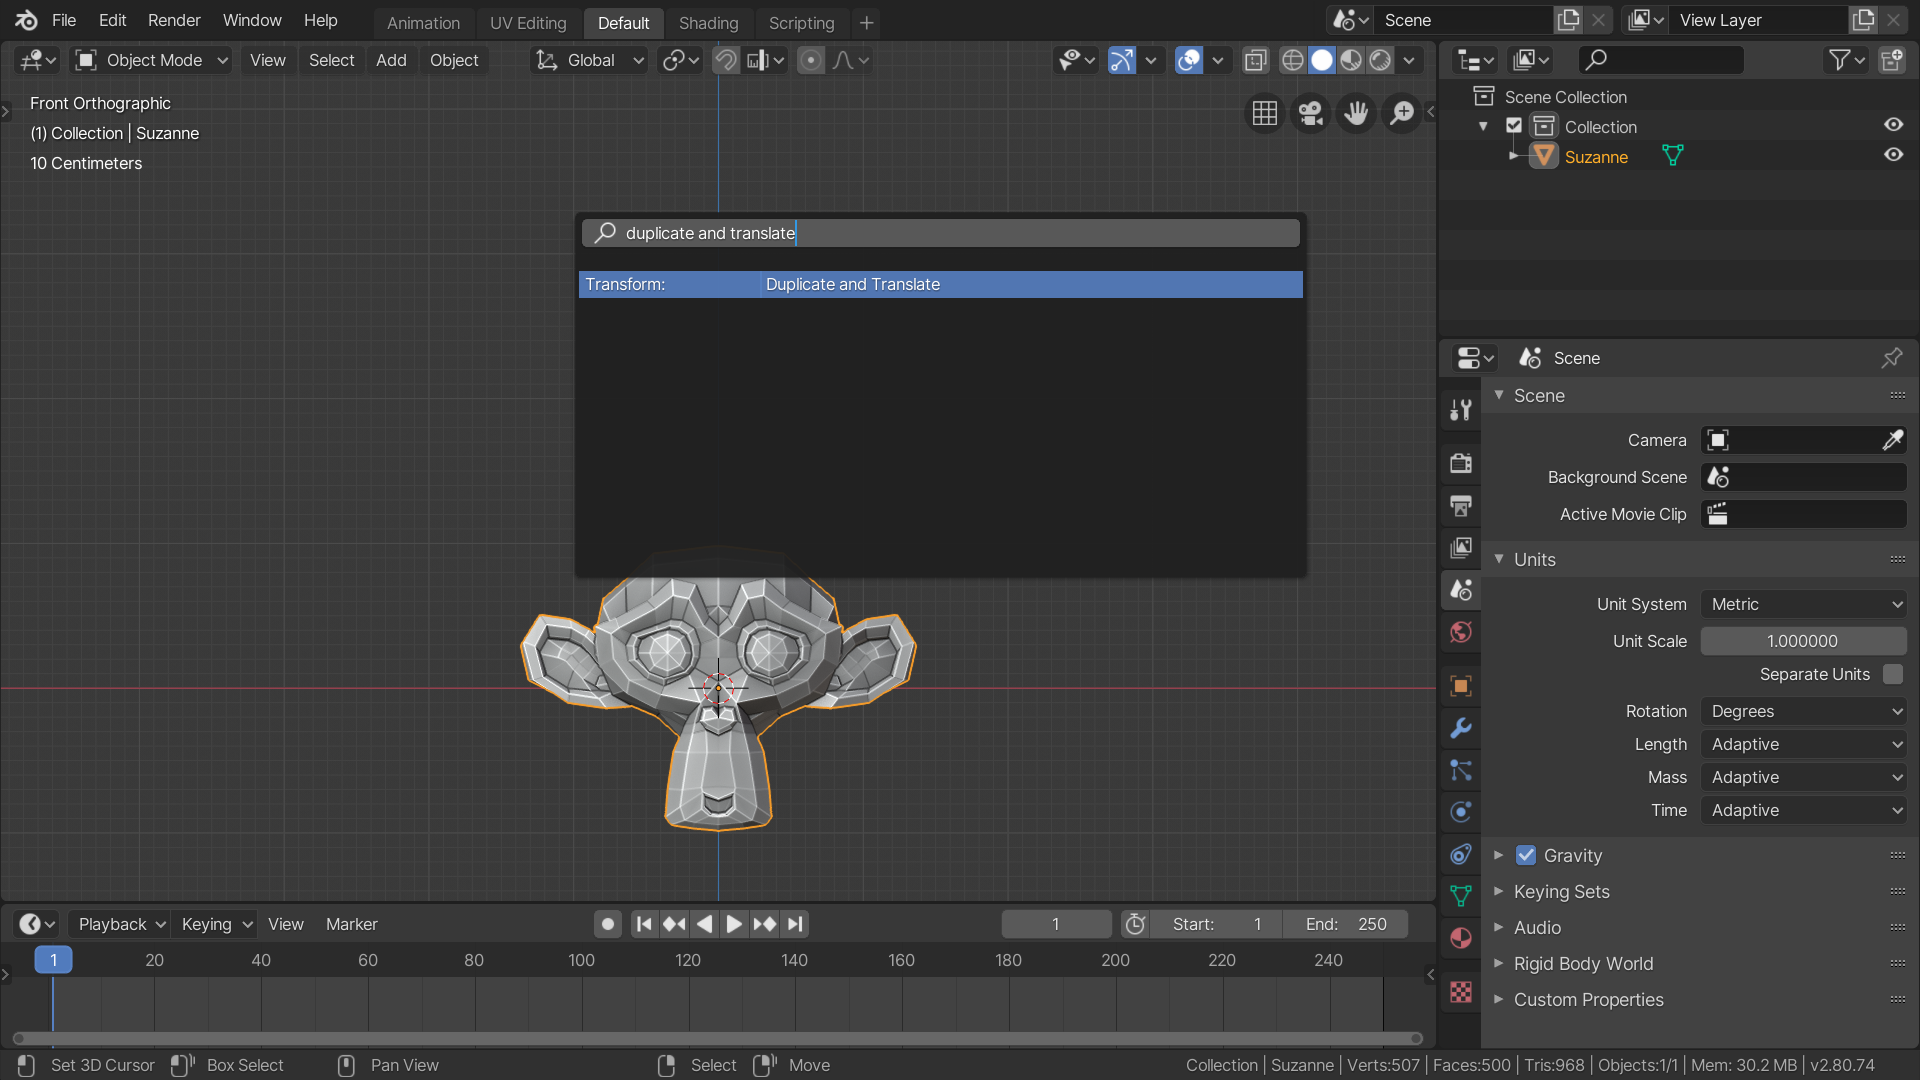
Running our new operator via the Operator Search popup.
Congratulations! You’ve written an addon that performs an action faster than a human could, although it has dubious value. The user can’t even set how much to translate the objects after they’re duplicated. Don’t worry, though: the Blender developers have already thought about this exact problem, and come up with a solution: properties.
Adding a Property
Operators perform actions, and Properties save data. Almost every
value in a Blender file is a Property; they store material colors,
the position of an object, the influence of a constraint, and
virtually everything else with a slider, an input box, or a dropdown.
Properties usually have a datablock they’re tied to; for example, a
material color is part of a material datablock. There are a
few different types
of Property, each used to store different kinds of value. Here’s a
non-exhaustive excerpt of just a few of the property types included
within Blender:
| Name | Purpose | Example |
|---|---|---|
BoolProperty |
A single boolean value; True or False. |
scene.render.use_overwrite |
EnumProperty |
Contains multiple hardcoded options. | scene.render.engine |
FloatProperty |
A single floating-point property. | scene.render.resolution_percentage |
IntProperty |
A single integer property. | scene.render.resolution_x |
StringProperty |
A single string. | scene.render.filepath |
CollectionProperty |
List of values. | scene.objects |
Properties don’t exist in a vacuum, though. They need to be tied to something; for example, the scene datablock, an object datablock, or a material datablock. Or, in our case, an operator.
First off, let’s see how to add a floating-point property. (For now, we’ll only allow the user to specify a vertical offset.)
# ...

class DuplicateAndTranslate(bpy.types.Operator):
    # ...

    transform_vertical_distance: FloatProperty(
        name='Vertical Distance',
        description='Move duplicated objects up by this amount.',
        default=0
    )

    # ...

    def execute(self, context):
        # ...

        # Now, create a transform vector, using the distance requested by the user.
        transform_vector = [0, 0, self.transform_vertical_distance]

        # And then transform the objects.
        bpy.ops.transform.translate(value=transform_vector)
    # ...

# ...
There’s a few things to note here. First of all, notice that we
declared transform_vertical_distance as an
attribute, not a
variable. Instead of an equals = character, we’re using the colon
: character. (This is not important to you, the addon developer, but
don’t forget to do it this way.) If you use = instead by mistake,
Blender will print out a warning:
Warning: class TRANSFORM_OT_duplicate_and_translate contains a property which should be an annotation!
/home/zlsa/.config/blender/2.80/scripts/addons/object_duplicate_translate.py:78
    assign as a type annotation: TRANSFORM_OT_duplicate_and_translate.transform_vertical_distance
The line number actually refers to the line of
bpy.utils.register_class(...), but the name of the offending
property is included.
Blender uses annotations to declare properties within operators. This
is because Why use annotations?
transform_vertical_distance isn’t actually a variable, no
matter how much it may seem like one. For example, when calling your
operator, you don’t set the class variable
transform_vertical_distance, then call the execute method;
instead, you call
bpy.ops.transform.duplicate_and_translate(transform_vertical_distance=42),
and Blender itself calls the appropriate method of your operator
class.
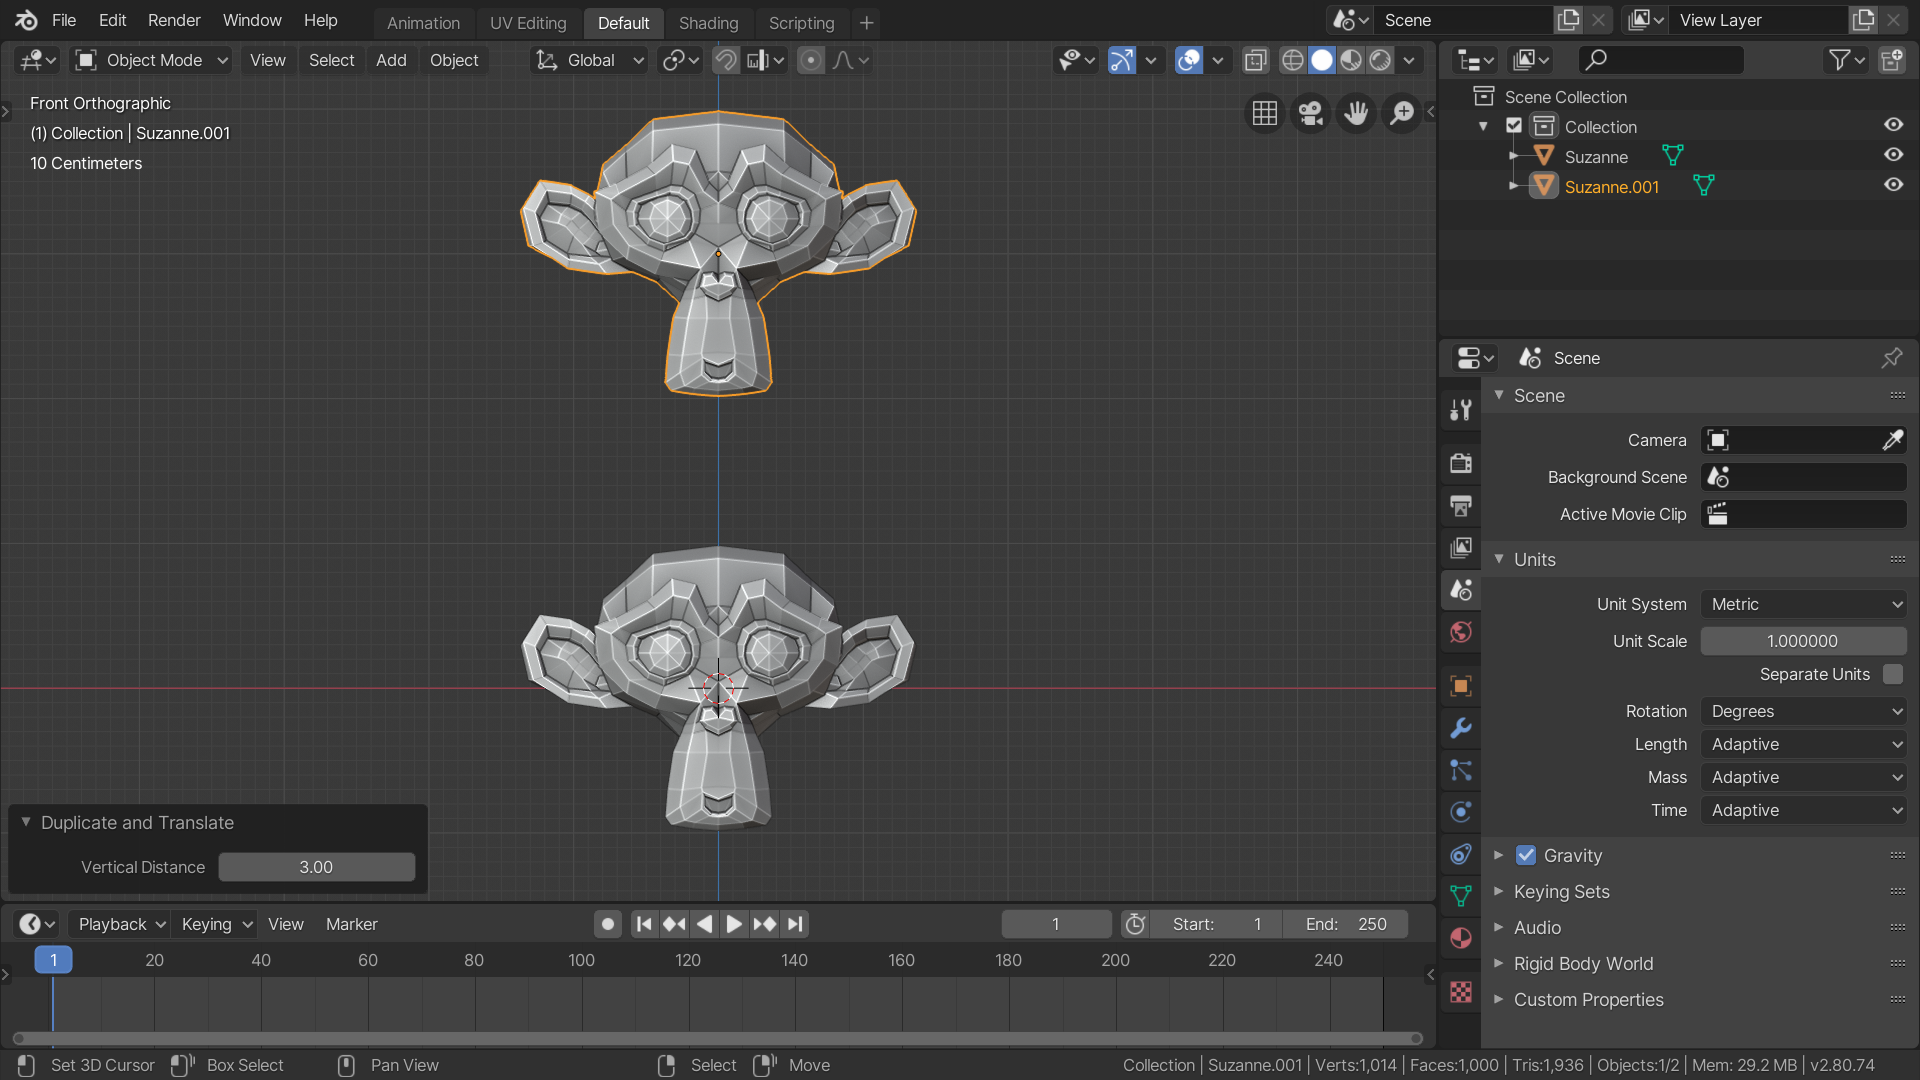
The new Vertical Distance property
After adding the FloatProperty and modifying the execute(...)
method, try running the operator again. Pay close attention to the
Operator Settings popup in the lower-left corner of the 3D view. The
title will be the label of our operator (as set in bl_label), and if
you open it up by clicking on the title, you’ll see our new
FloatProperty is present, with the label “Vertical Distance”
alongside the number field. Try changing the value and watching the
operator run again with the new parameters!
At this point, you’ll be wondering how Blender knows to undo the
operator before running it again. (If it didn’t, you’d be creating new
objects whenever you changed the “Vertical Distance” value.) Thankfully, you don’t need to worry about it! Since Blender is calling
your operator, it remembers what the file looked like before you ran
it, and automatically restores to that point whenever the operator
values are changed. This lets operator authors worry about the details
without needing to think about values changing on the fly, because the
Redoing operators
execute function is called with the proper state every time.
Creating a poll(...) method
You may have noticed a problem at this point with our operator. It’s
only supposed to be used in Object mode, but there’s nothing enforcing
that; if you try to run it in Edit mode (with the Operator Search
popup), it’ll still show up and let you run it, but the
bpy.ops.object.duplicate(...) operator will throw an exception.
The hint as to why this is happening is in its name:
bpy.ops.object. It operates upon objects, and cannot be called
unless the current mode is Object mode. To hide our operator whenever
the user is not in Object mode, we need a poll class method:
# ...

class DuplicateAndTranslate(bpy.types.Operator):
    # ...

    # If this returns `False`, this operator is not valid at the moment.
    @classmethod
    def poll(cls, context):
        return context.mode == 'OBJECT'

    # ...

# ...
The poll function returns True if the context is correct for this
operator, or False if it’s not. Blender will call this function
before showing the user this operator, and if it returns False,
Blender will disable it. (If it’s a menu item or a button, it will be
disabled; if the user is using the Operator Search popup, it simply
won’t show up.)
We define a class method with Python’s
@classmethod
annotation. Class methods aren’t run on an individual instance of the
class; instead, they’re run with the class itself as the first
argument, and the current Blender
context as
the second. The context is an object that contains information about
the current status of Blender; for example, the mode of Blender, the
current scene, the current render engine, and other information along
those lines. In our case, we care about being in Object mode, so we
return True if context.mode is OBJECT.
Once you’ve added the poll class method to our operator, the
operator won’t show up unless we’re in Object mode.
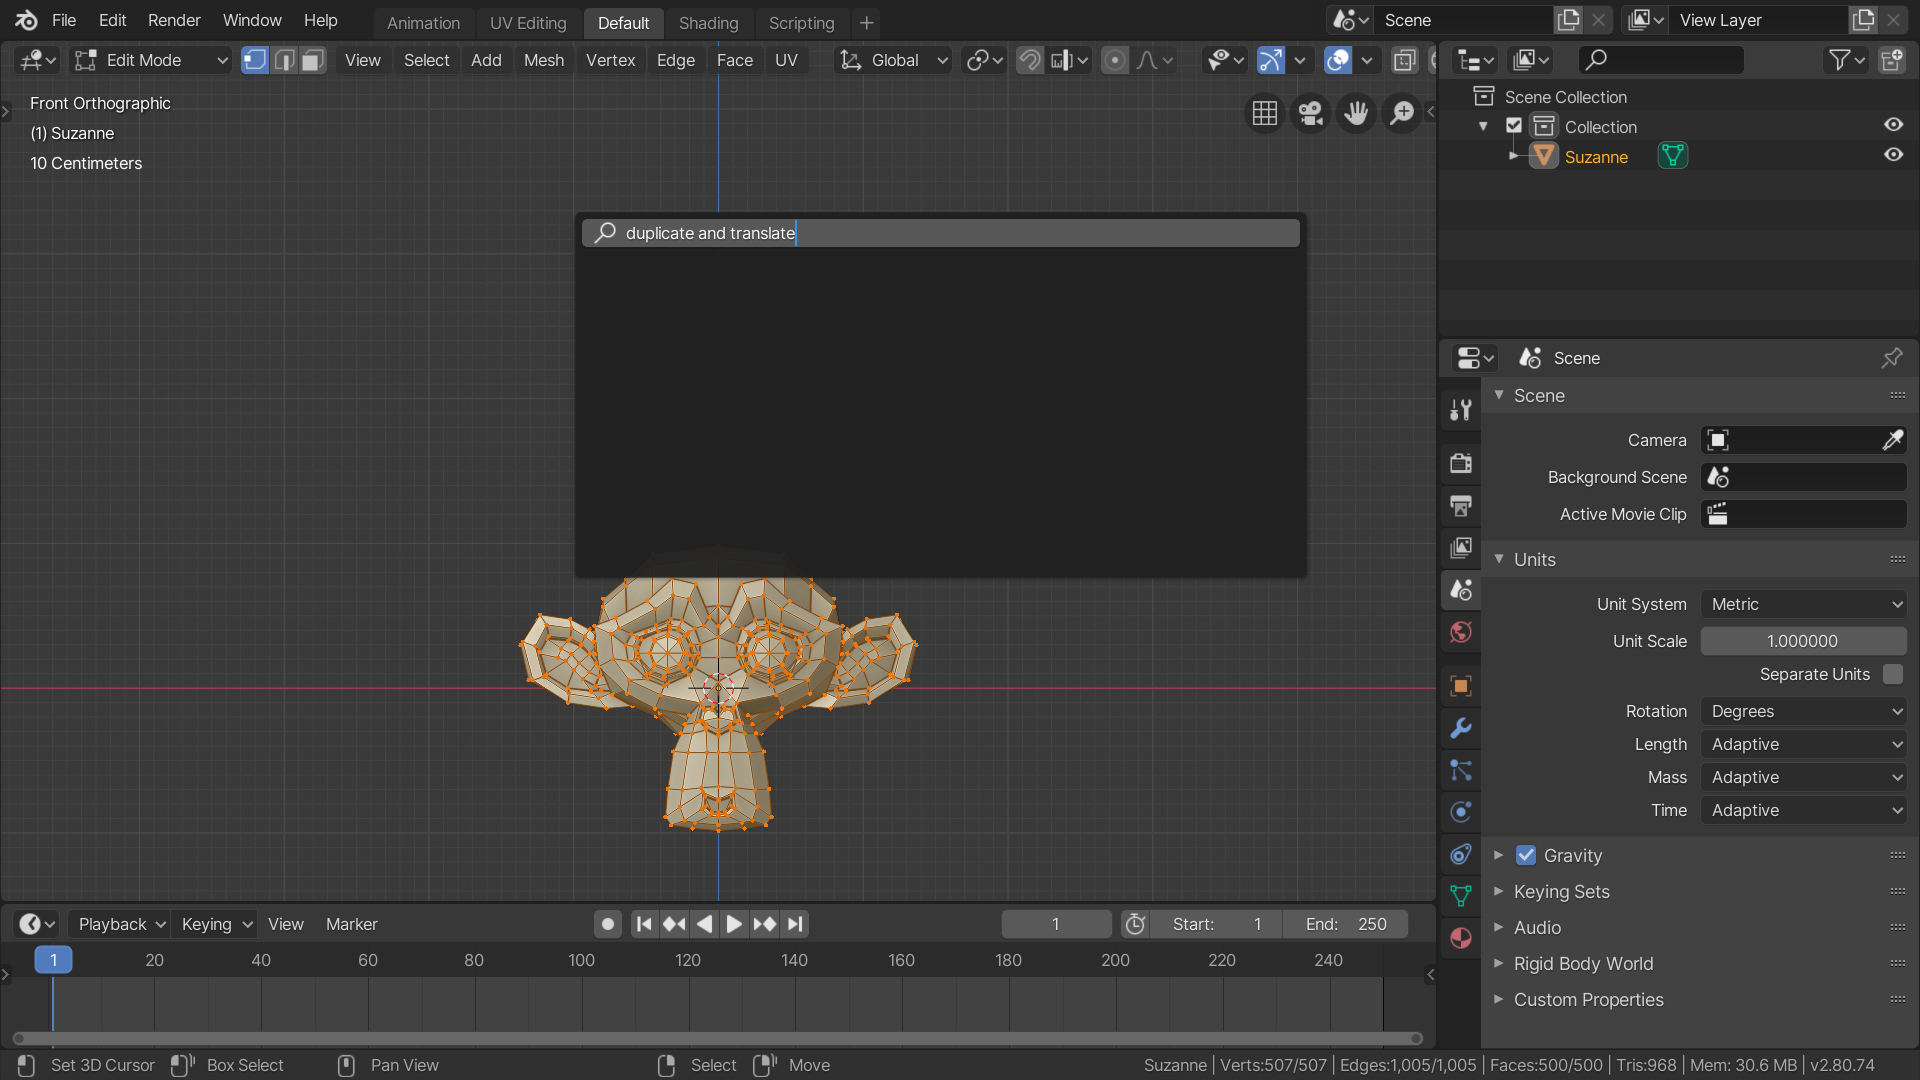
The poll function won't let Blender run our operator in Edit mode.